


Kit's First Birthday Party
Thoughts, tutorials, recipes, and gift ideas

On the first Saturday after my baby girl somehow, still a newborn, turned one, we celebrated her birthday with our families. I spent the first two weeks of March cutting construction paper, tracing numbers, scavenging pretty butterflies from wrapping paper, gluing pompoms. Kit rarely lets me work on much during the daytime – her own stack of paper to scrunch and tear only lasts a minute or two – so I waited until after she was sound asleep, while Price washed bottles and Annie rested beside me, a silent source of support, for her mother who is realizing how heartbreaking time is.
I have thought of this party for months, how I want my baby to cherish her birthday every single year, because of how I’ve celebrated it, and this is the start. I had running lists on my phone of where I wanted everything to go, how many terracotta pots I needed for the backyard, what chores needed to be done and when, what to serve with chicken salad on croissants. We ordered her gifts in plenty of time (a swing set and some books), and by Monday morning of her birthday, I was surprisingly counting down the minutes until Saturday morning. Surprisingly, due to my complicated relationship with hosting people in my home. This odd (and frustrating) mix of excitement to have people come sit around our table, enjoy food Price and I love, candles and yacht rock playlists, but then jammed in, ruining it all in my mind, this existential feeling of time running out before every detail is perfect, my face turning bright as a strawberry. The desperate cranking down of the air conditioning, bare feet when I meant to wear my lost house slippers, a glimpse of myself in the mirror hours into the night that only makes me feel worse. Meals that don’t time out just right, desserts cooked a tad too long, despite my dedication to under baking anything sweet. And then when they all leave, I’m left with one million regrets of things I said or faces I made, all to ponder over as I clean the kitchen, spiraling and thinking to myself: “Why do I do this to myself?”
Well, I do it because I love setting the table, and I love having my family over. I love the feeling of my home with the candles lit and the pillows fluffed. And despite my self-diagnosed condition of never saying the right thing at the right time in any social situation, I love talking to the people I love.
And so, I say all this because this party was one I really had been prayerful over. For sunshine and safe travels, for nobody to get sick beforehand, for Kit to be happy, but mostly for my own mind, that when everyone left at the end of the day, I would fall into the couch with my baby and feel sad it was over, and then have a piece of leftover birthday cake I didn’t let anybody take any leftovers from. Content, still, and at ease.
Which is exactly what happened, and for this, I am so, so grateful. And therefore avoiding taking down her decorations, because I wish we could do it all again. I wish she would remember how precious of a morning we had, with her baby cousins and her grandparents and our siblings who love her so dearly. Golf on the television, just like this weekend a year ago, when she first came home. The most thoughtful gifts, the happiest baby, content to be the center of attention. The morning of her first birthday party felt like magic, like everything I’ve ever wanted for my daughter to feel. And her presence put my own mind at ease, the magic I’ve only ever wanted for myself.
//
I wanted to share a few details from Kit’s birthday party that might help the next mother, some *loose* tutorials, party supplies, links to what I think was the most wonderful line up of first birthday gifts! For reference, the original plan was to have everyone out in our backyard, where they could enjoy watching her swing and toddle around on grassy quilts. So while I didn’t have a theme necessarily, I leaned into the garden party aesthetic…toadstools, baskets of daffodils, quilts, lemonade. (And then I woke up early Saturday morning to thunderstorms and moved the whole thing inside, which, in hindsight, was sweeter anyways!)
All links to party and craft supplies, as well as gifts are at the bottom of this post!
Preparing for the party…
One of the greatest things I attribute my lack of stress during and after the party to was asking everyone to either take their shoes off or wear disposable shoe covers. I bought them in a pack of 100 and had them rolled up in a basket by the door, and while only one grandparent complained, it was all worth it, because afterwards, I didn’t have one urgent compulsion to drag the vacuum out.
I also, as I said before, started planning every tiny detail weeks and weeks before, listing out every single thing I might possibly need: invitations, napkins, silverware, which serving platters I’d use, if I needed to borrow a quilt from my mother. I always find it helpful, as a person inclined to unnecessary stress, to list out every little thing, as to combat scrambling the night before. This really sounds so silly as I write it, but I just felt so determined to enjoy my baby’s party as her mother, and not the host. And I did that by planning this little 14-person gettogether as if it were a black tie banquet.
Excessive planning also aided in no excessive spending, or at least, I think I did relatively well with my budget. With enough time to consider which paper plates to order or which tablecloths to use, I found myself rummaging through my own collection of paper items, of baskets, of tablecloths and place settings. I ended up only buying the paper goods for the party itself: invitations, paper plates and cups, napkins, and then a package of baby pink balloons.

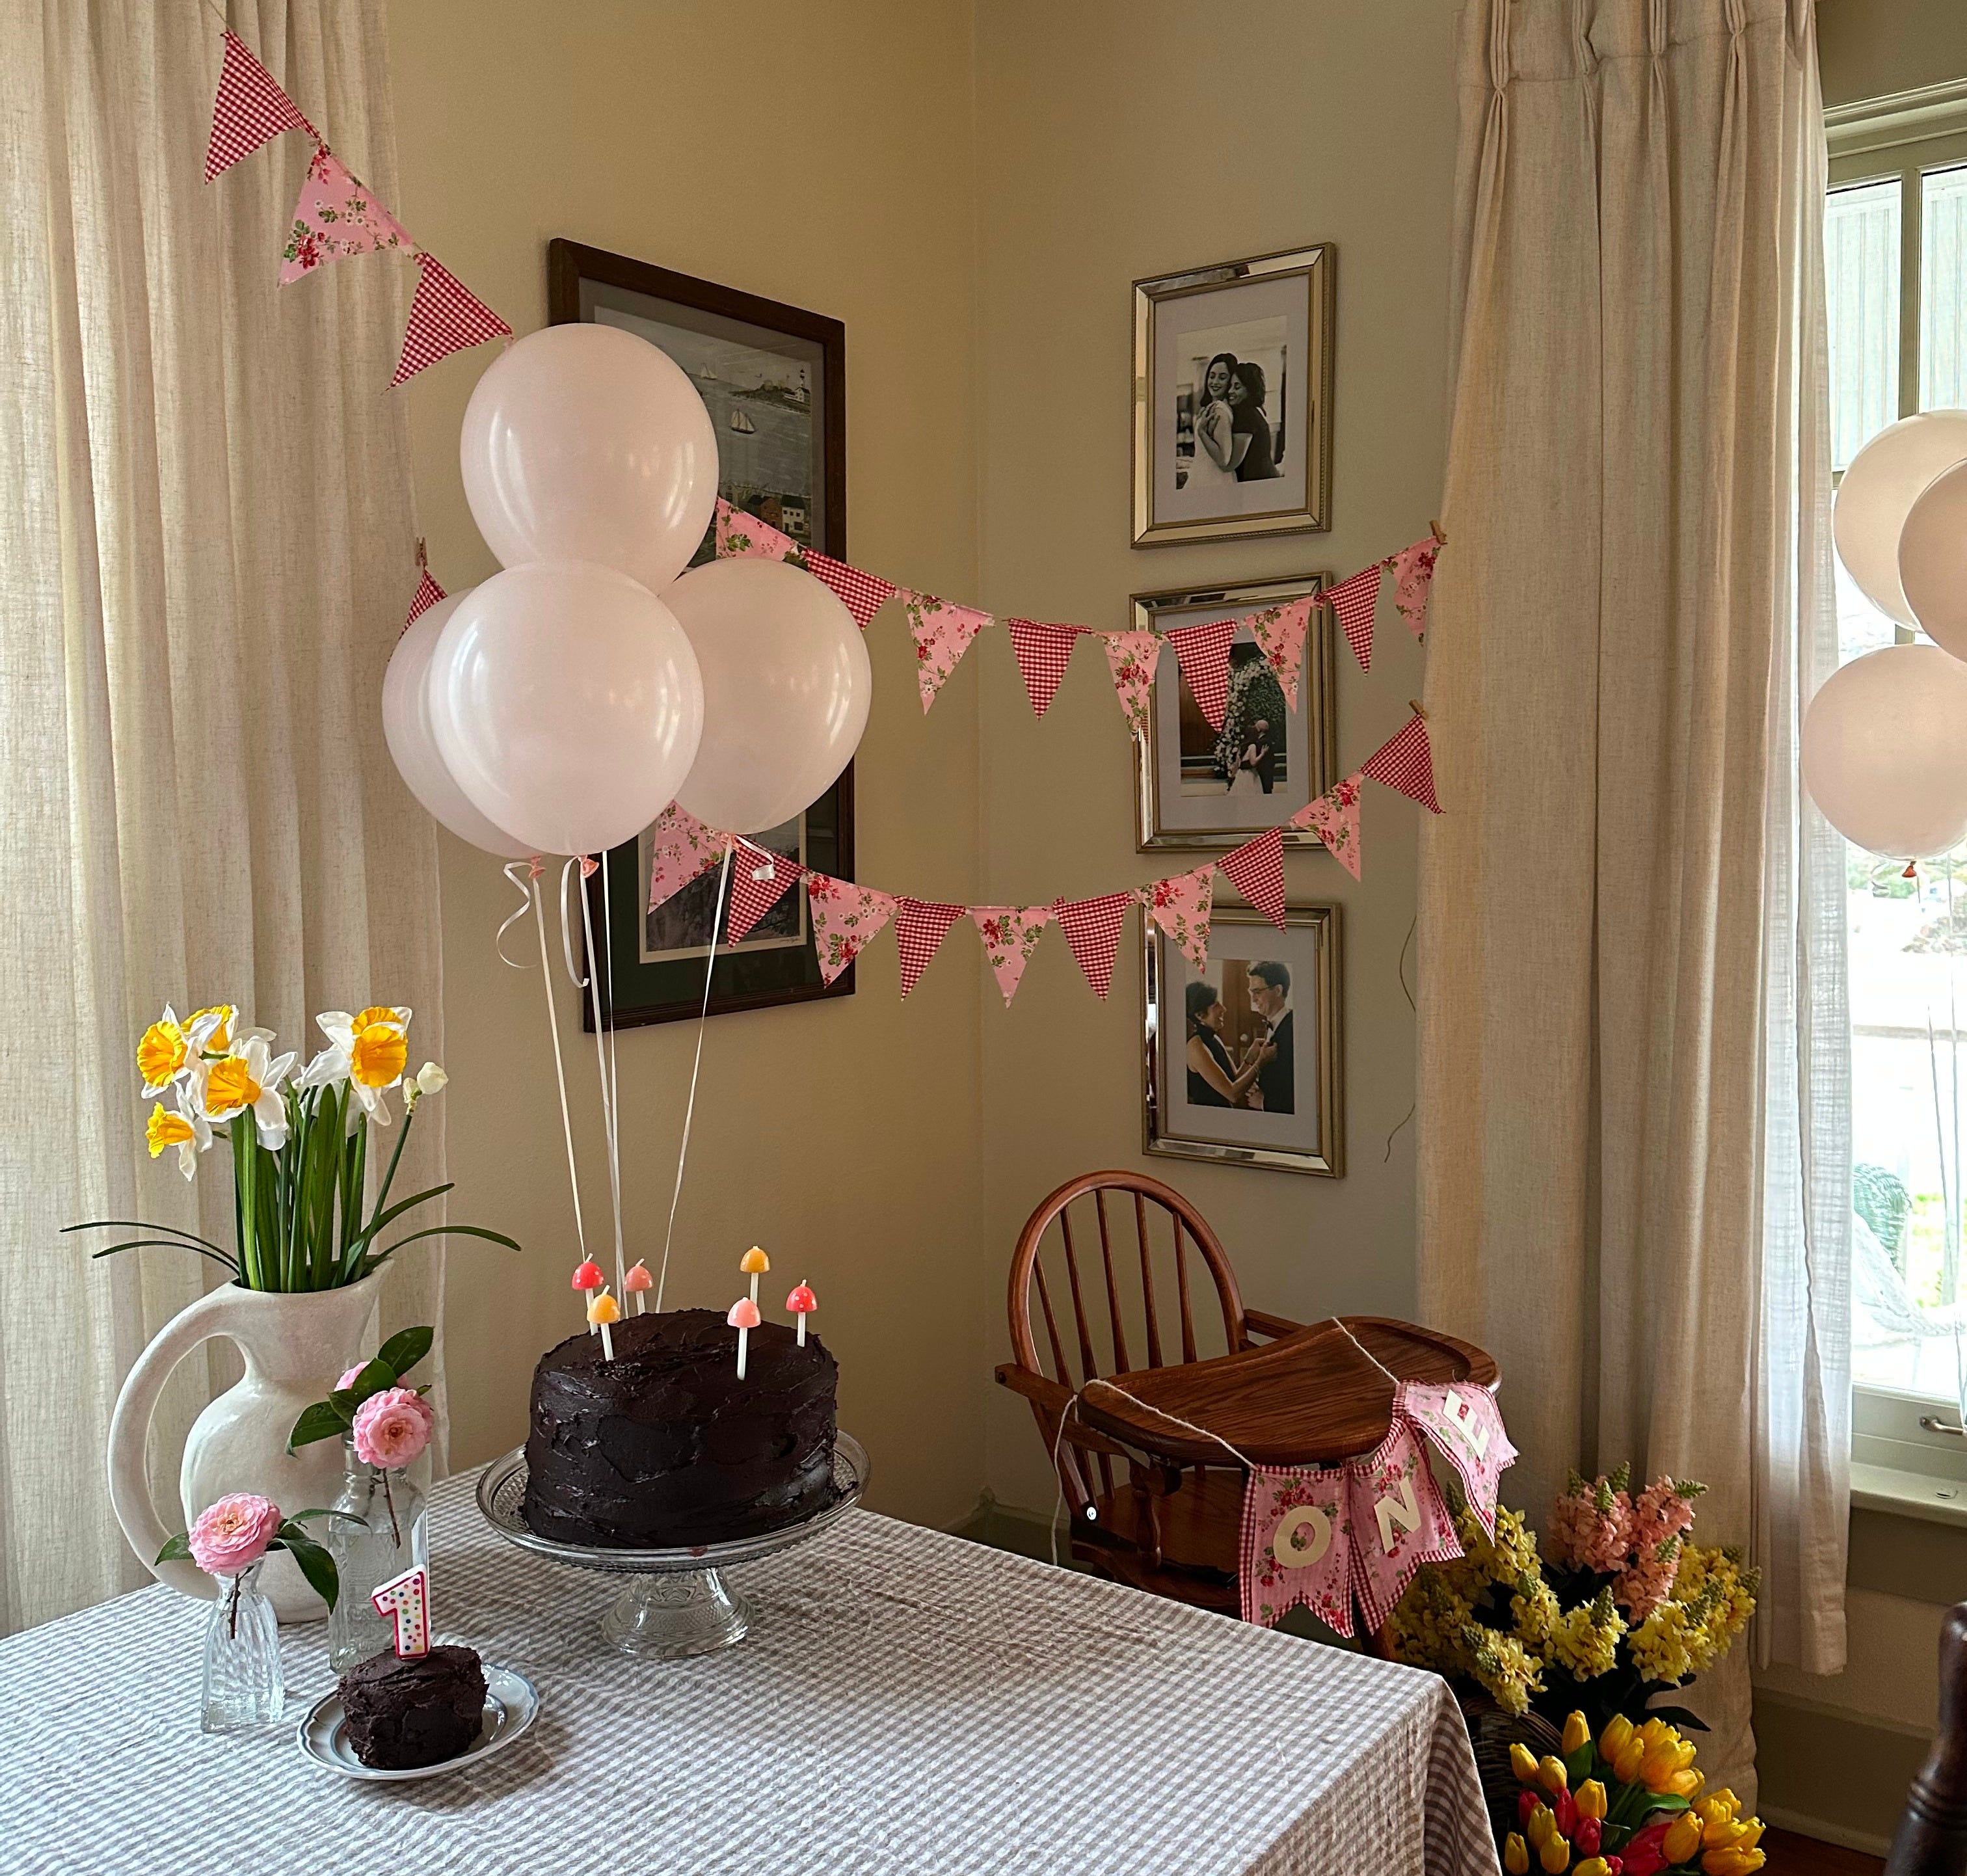
I will say, my biggest advantage came from my family’s owning a flower shop, where the floor is barely visible from the baskets upon baskets of beautiful silk flowers for sale. While my first thought had been to ask my dad to make extravagant fresh arrangements for each table, I realized how easy it would be to just go take some of those baskets and borrow them for the weekend, baskets of the most realistic daffodils and tulips I’ve ever seen in my life. I took enough to fill pitchers all around the house, baskets at the foot of Kit’s high chair. And scattered throughout, I cut a few stems from my pink camellia tree the morning of and gathered them in old milk jugs and tiny vases I’ve collected over the years.
Crafting…
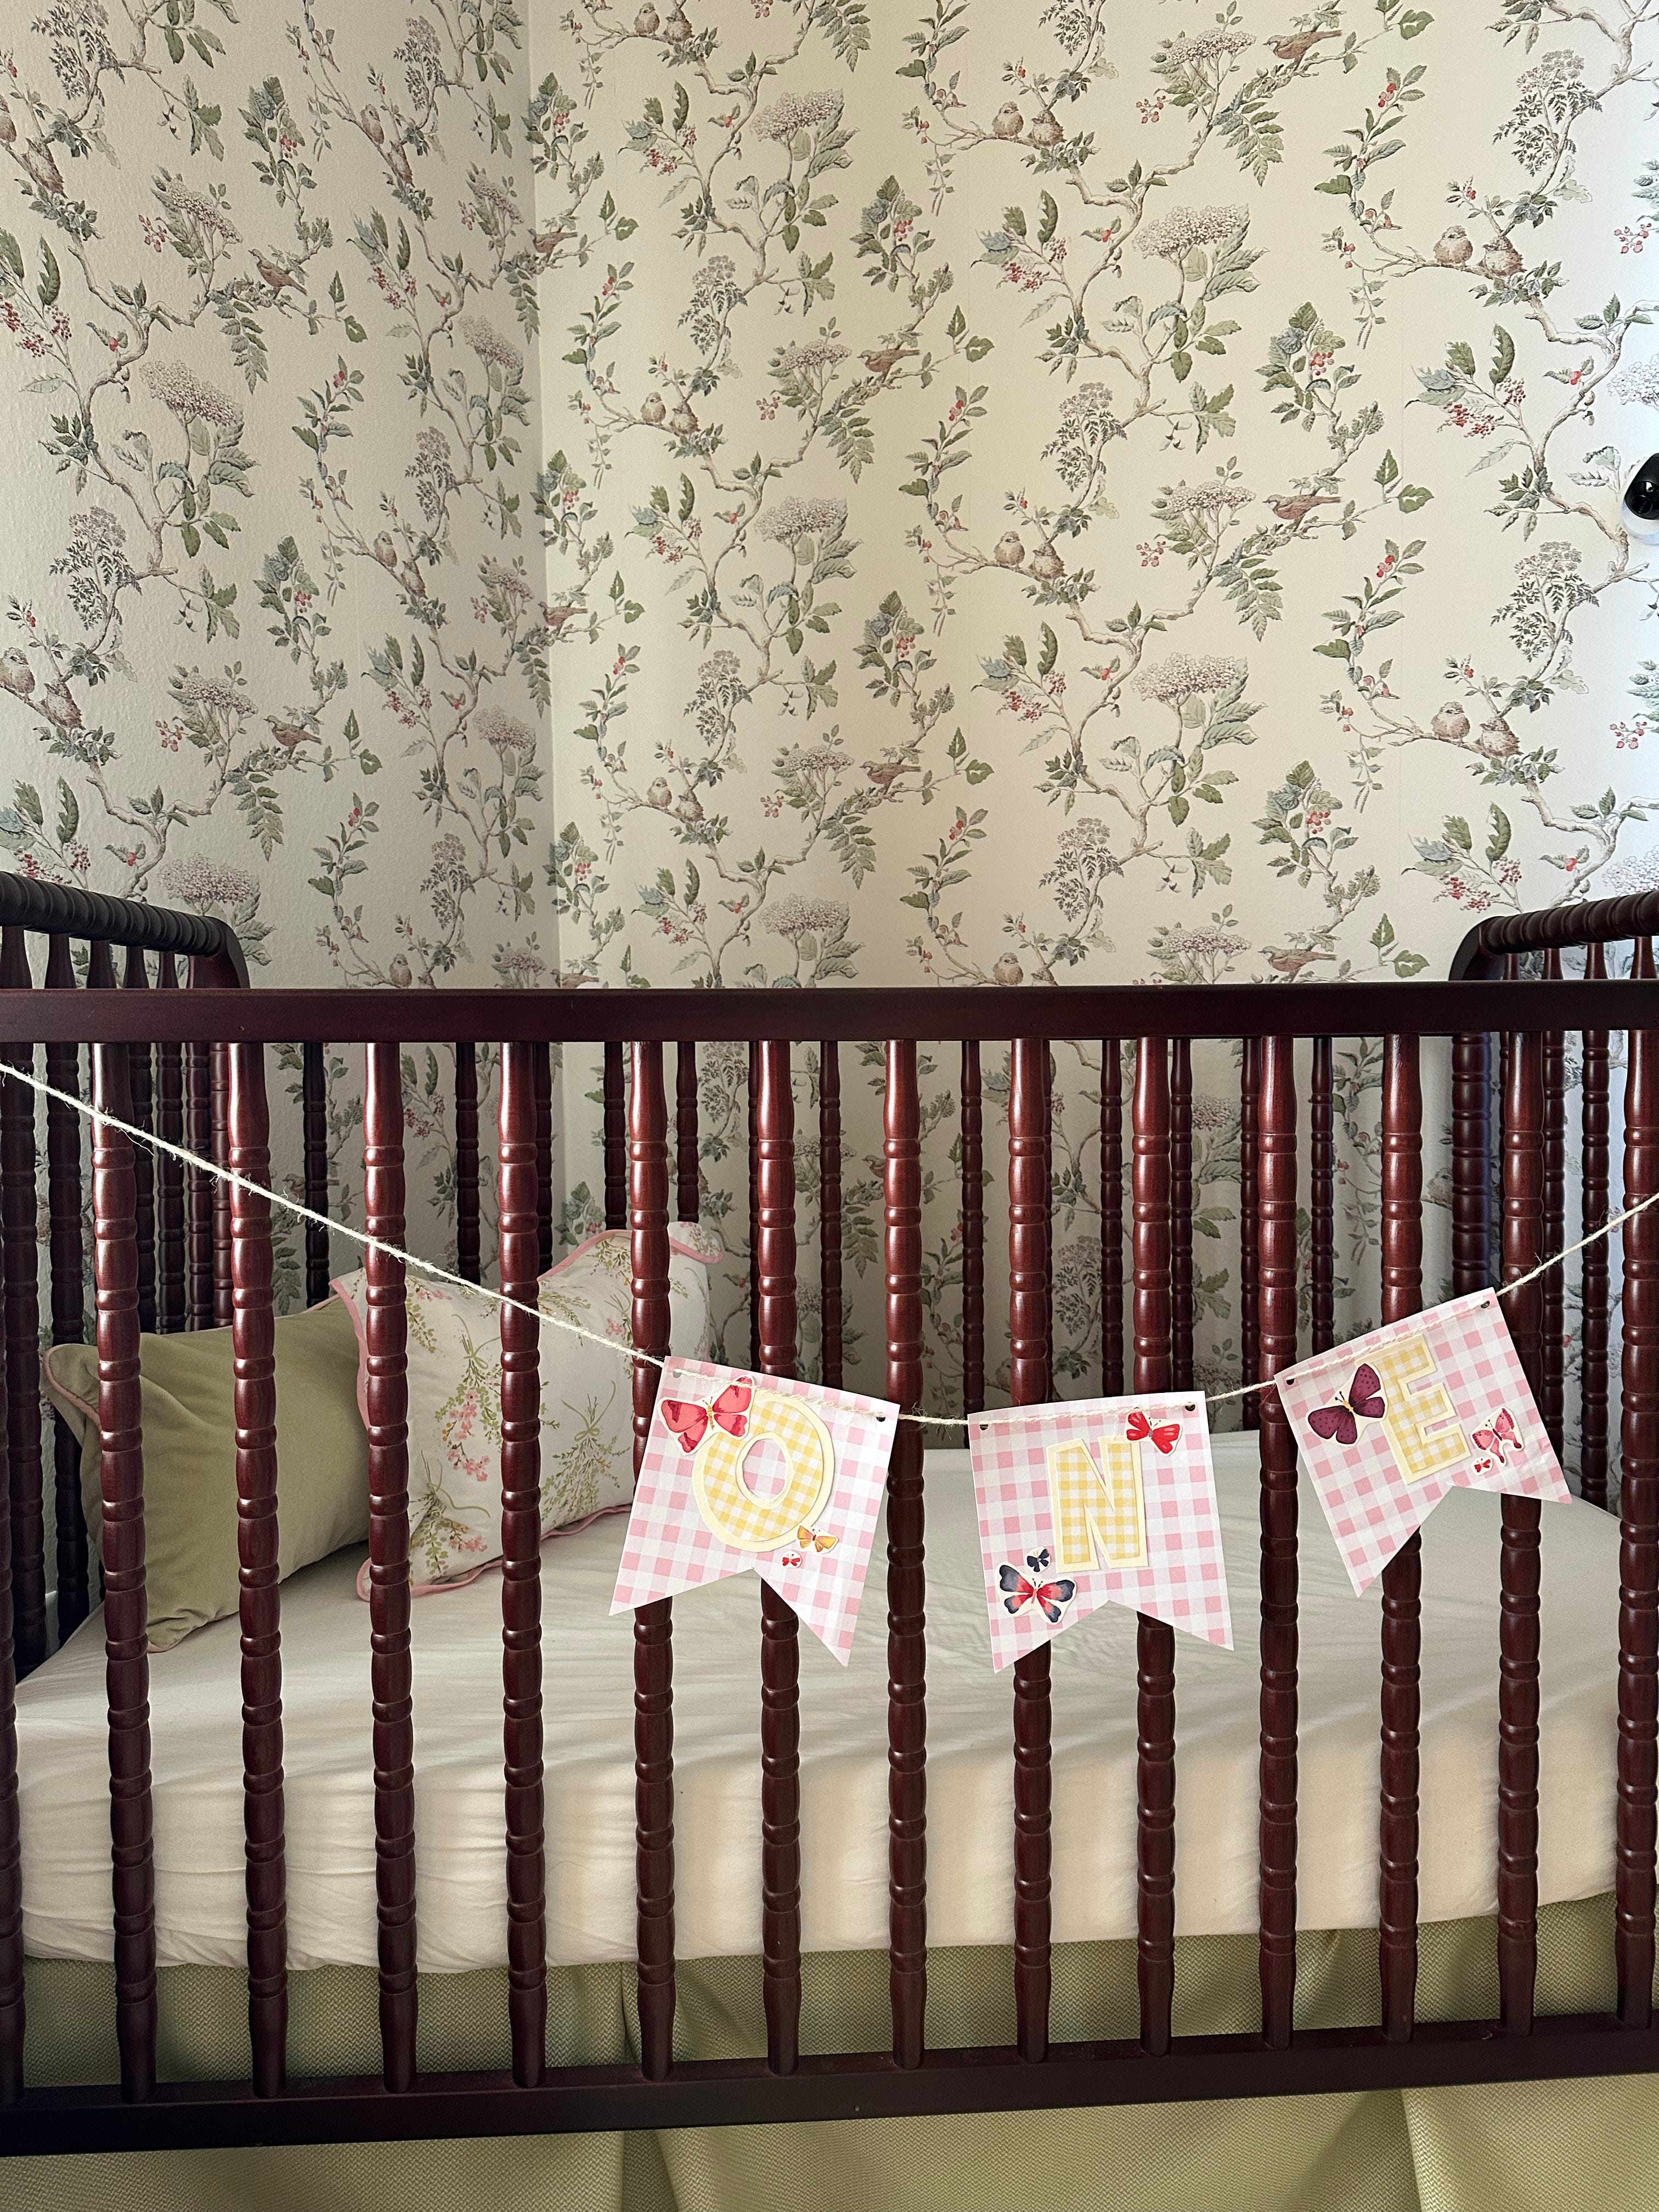
“ONE” banner for her crib
This originally was going to go on her high chair, like the pretty ones you buy from Etsy made with embroidered fabric and ribbon. I changed my mind and made another one, but still used this one for her actual birthday, tied with string on the corners of her crib for when she woke up, and then I moved it to the living room mantle on the morning of her party!
Someone asked for a tutorial for this on Instagram, and I didn’t even respond, because I am not sure what to say except I cut it all out and taped it together, and I fear that sounds a tad condescending. However, I will try my best here.
Need:
- Two patterns of construction paper, one solid color construction paper
- Double sided tape or glue
- Thick string/twine
- Pencil
- Hole punch
- Scissors
I love pattern play, especially when it comes to Kit. For Valentine’s Day this year, I bought a pack of construction paper from Walmart that had both of these pink and yellow gingham prints, and I have already used every single one of those pages. I love them together, I love adding them to florals, I love them on their own. So I chose the pink to cut into pendant shapes, and then I used the yellow for the letters. I hand drew the letters on the back of the construction paper (pay mind to the need to draw them backwards!) and then ended up taping them to a solid piece of cardstock to add a more prominent border against the pink gingham. Hole punched in the top corners and strung my twine through it, and voila!
I could have left them plain, but I had bought two beautiful rolls of butterfly wrapping paper from Dogwood Hill, and I wanted to incorporate it however I could. So I carefully cut out as many butterflies as I could and used them as little pretty things on the corners of the letters.
Pendant garland
With the idea of an outdoor party in mind, I really wanted to hang garlands criss-crossed amongst our trees. I knew Walmart sold Waverly fabric in fat quarter packs, and so I chose a couple gorgeous prints, including a red gingham and a pink with red florals. That afternoon, as Kit played in her reading chair, I brainstormed how I might make a banner on my own, without a sewing machine (which I just don’t have the space for, but I fear I need given my discovery of being a crafty mom). I decided to just go for it, with a pair of old scissors not meant for fabric, a roll of twine, and a tube of fabric glue.
Need:
- Two patterns of fabric (maybe half a yard each…depending on how long you want yours to be!)
- Twine
- Fabric glue
- Scissors (preferably fabric scissors, but if not, the raw edges added character!)
I cut triangles out of each fabric, lining them up on the floor as I cut so I knew how many I was making. When cutting the size of the triangles, keep in mind you will fold the top over the twine and secure with fabric glue, so you will lose height in the finished product. When I was ready to string onto the twine, I unraveled however much twine I needed and straightened it out, then carefully lined up one triangle at a time, about two centimeters or so of the fabric above the twine, a line of fabric glue beneath it, and then fold the fabric over on itself. Make sure you are gluing and folding on the back side of the fabric, not on the side of the print! I do not recommend trying to glue the pendants and then stringing the twine through. As I type this, I wish I had had the foresight to take pictures as I went to better explain these instructions…it really was pretty simple though!
Because the party was moved inside, I didn’t have any space to use a long garland, so I ended up cutting it in half and using tiny wooden laundry clips to clip it onto our living room curtains to make a backdrop for her high chair! I have one of them clipped on the curtains in her bedroom now, hanging above her crib.
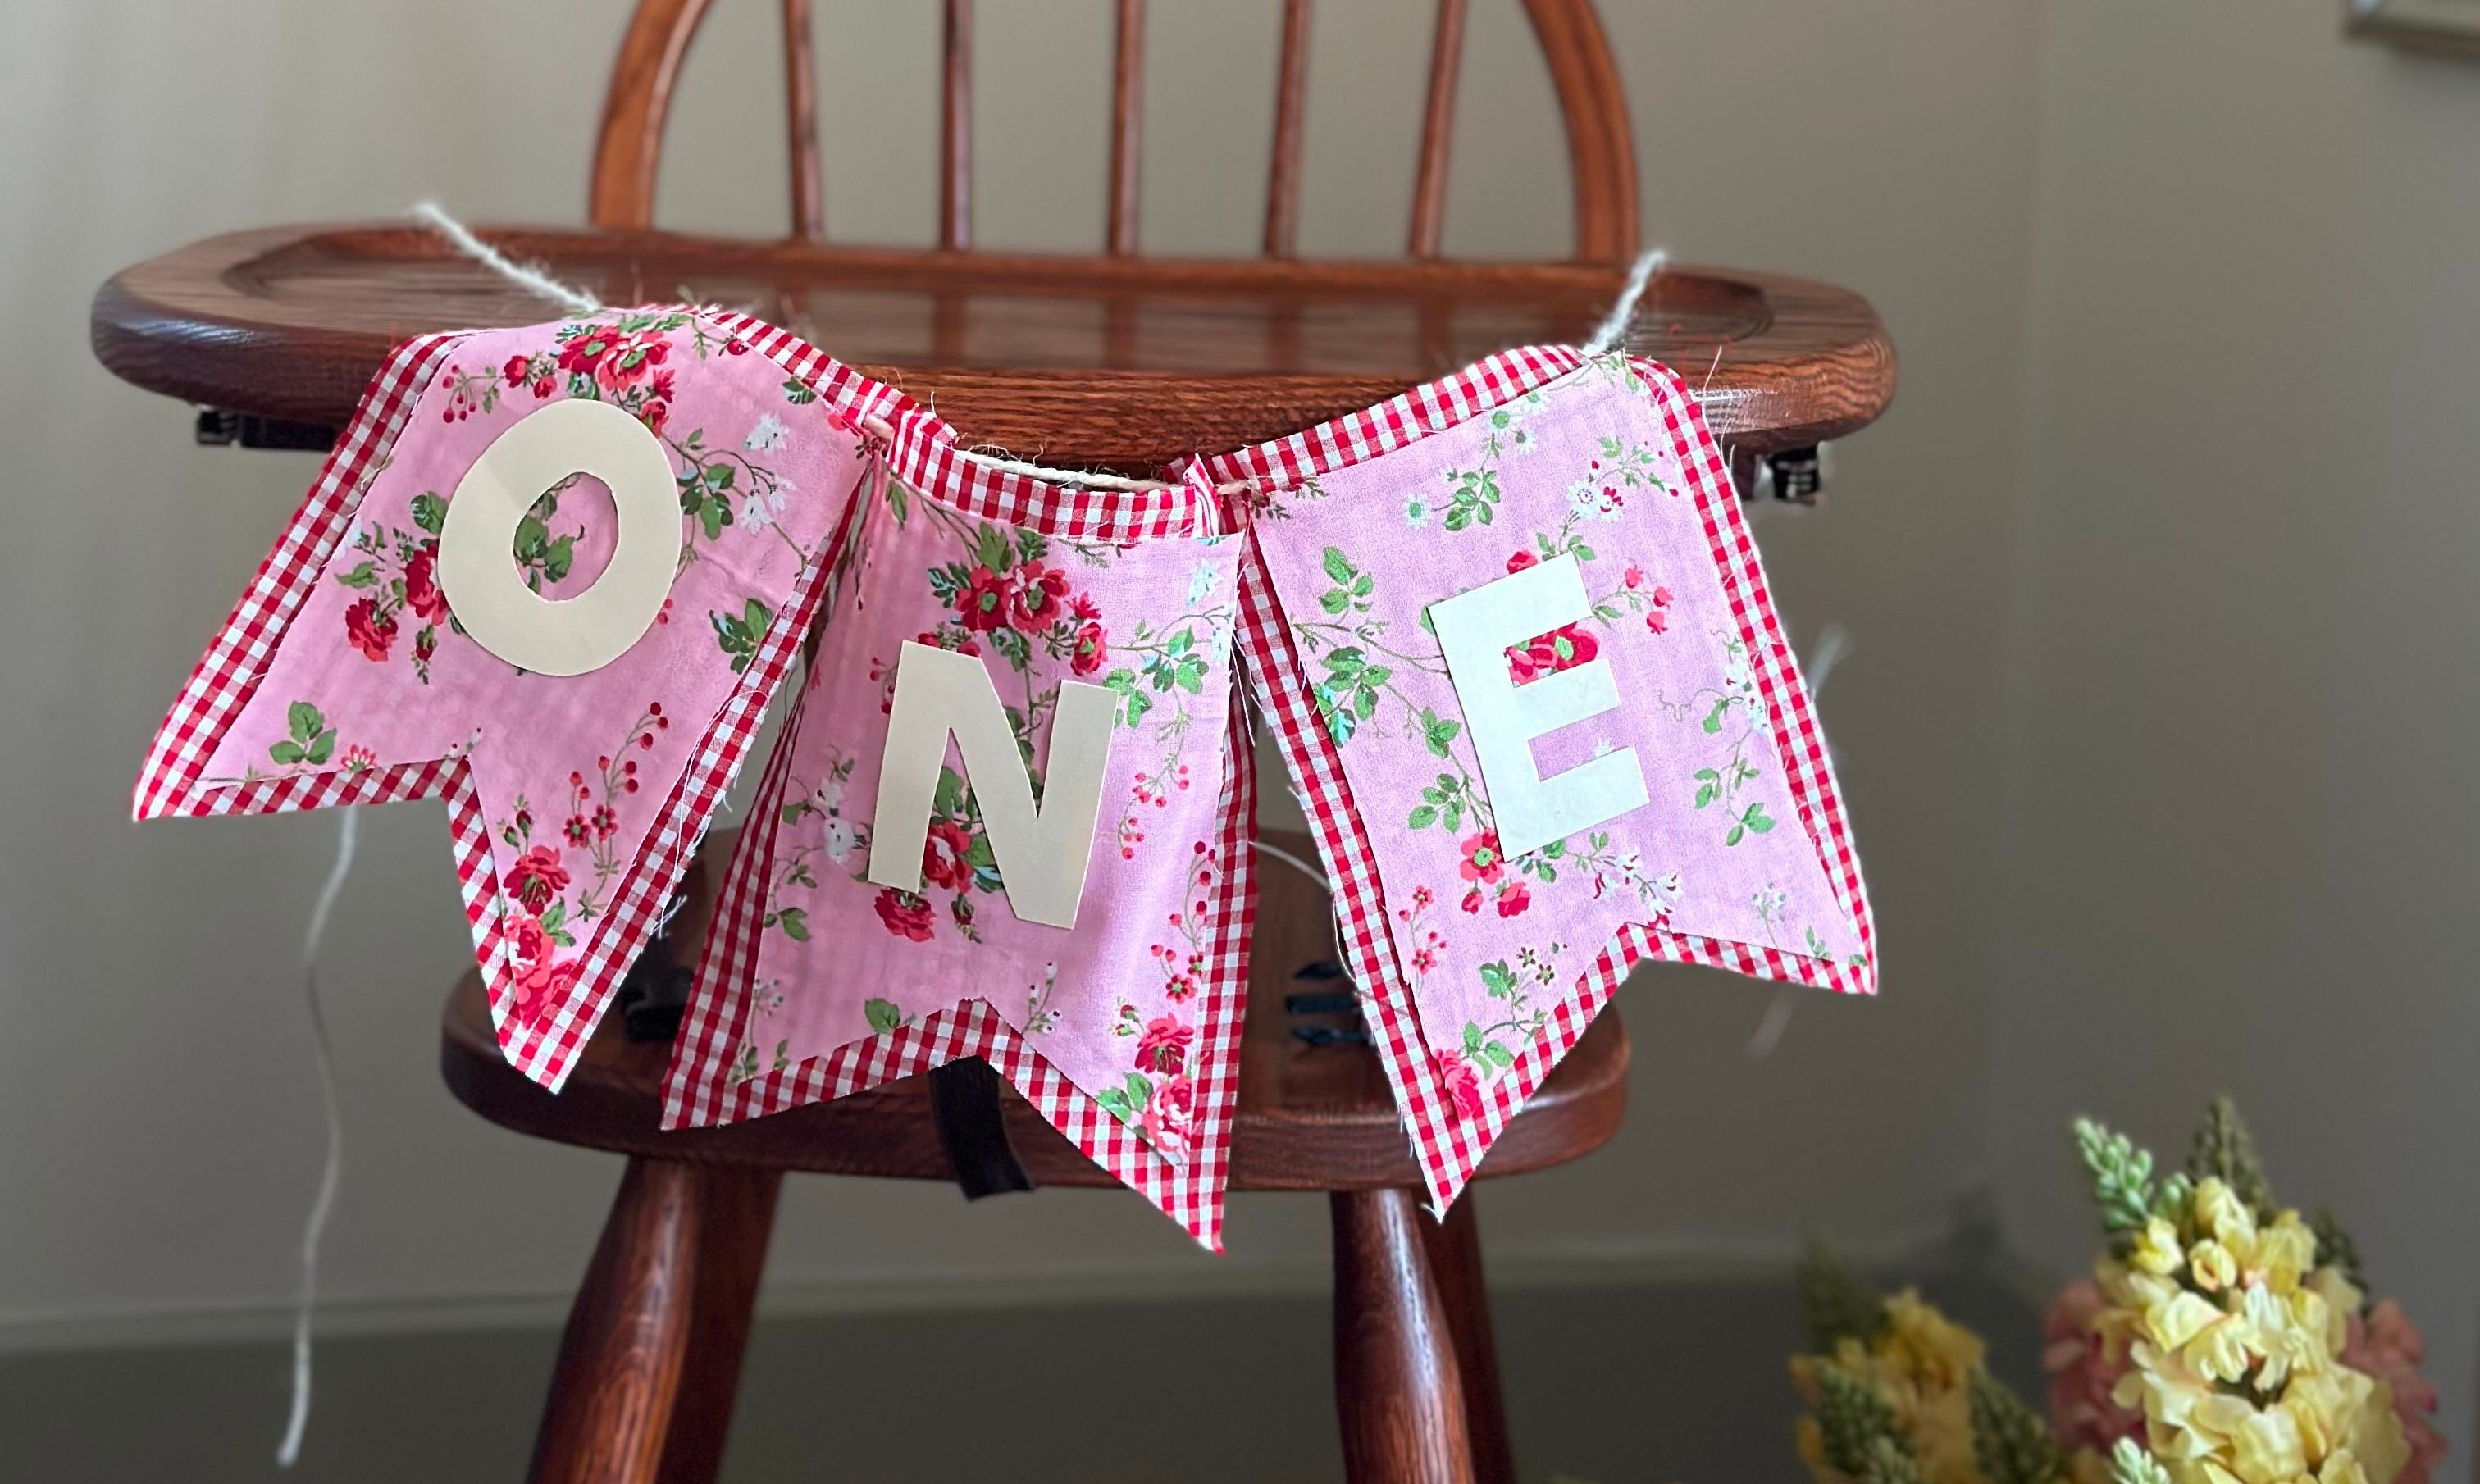
“ONE” highchair banner
I loved the gingham and floral, the pink and red so much, and the fabric glue worked so miraculously, I decided to try my hand at making a fabric version of the paper pendants I had made in the first place.
Needs:
- Two patterns of fabric, maybe a third of a yard
- Fabric scissors
- Fabric glue
- One page solid color cardstock
- Pencil
- Twine
I did basically the same thing as before…cutting out the large pendant shapes (I did this on the red gingham), then the small pendants (floral). I glued them together with the fabric glue and let them dry for a couple of hours before coming back with the cardstock letters. I originally planned on doing the letters in red gingham fabric, but couldn’t figure out how to trace the letters or cut them cleanly on fabric, so I settled on cardstock and glued those with fabric glue, too. For the twine, I just cut a small slit in the corners and strung them!
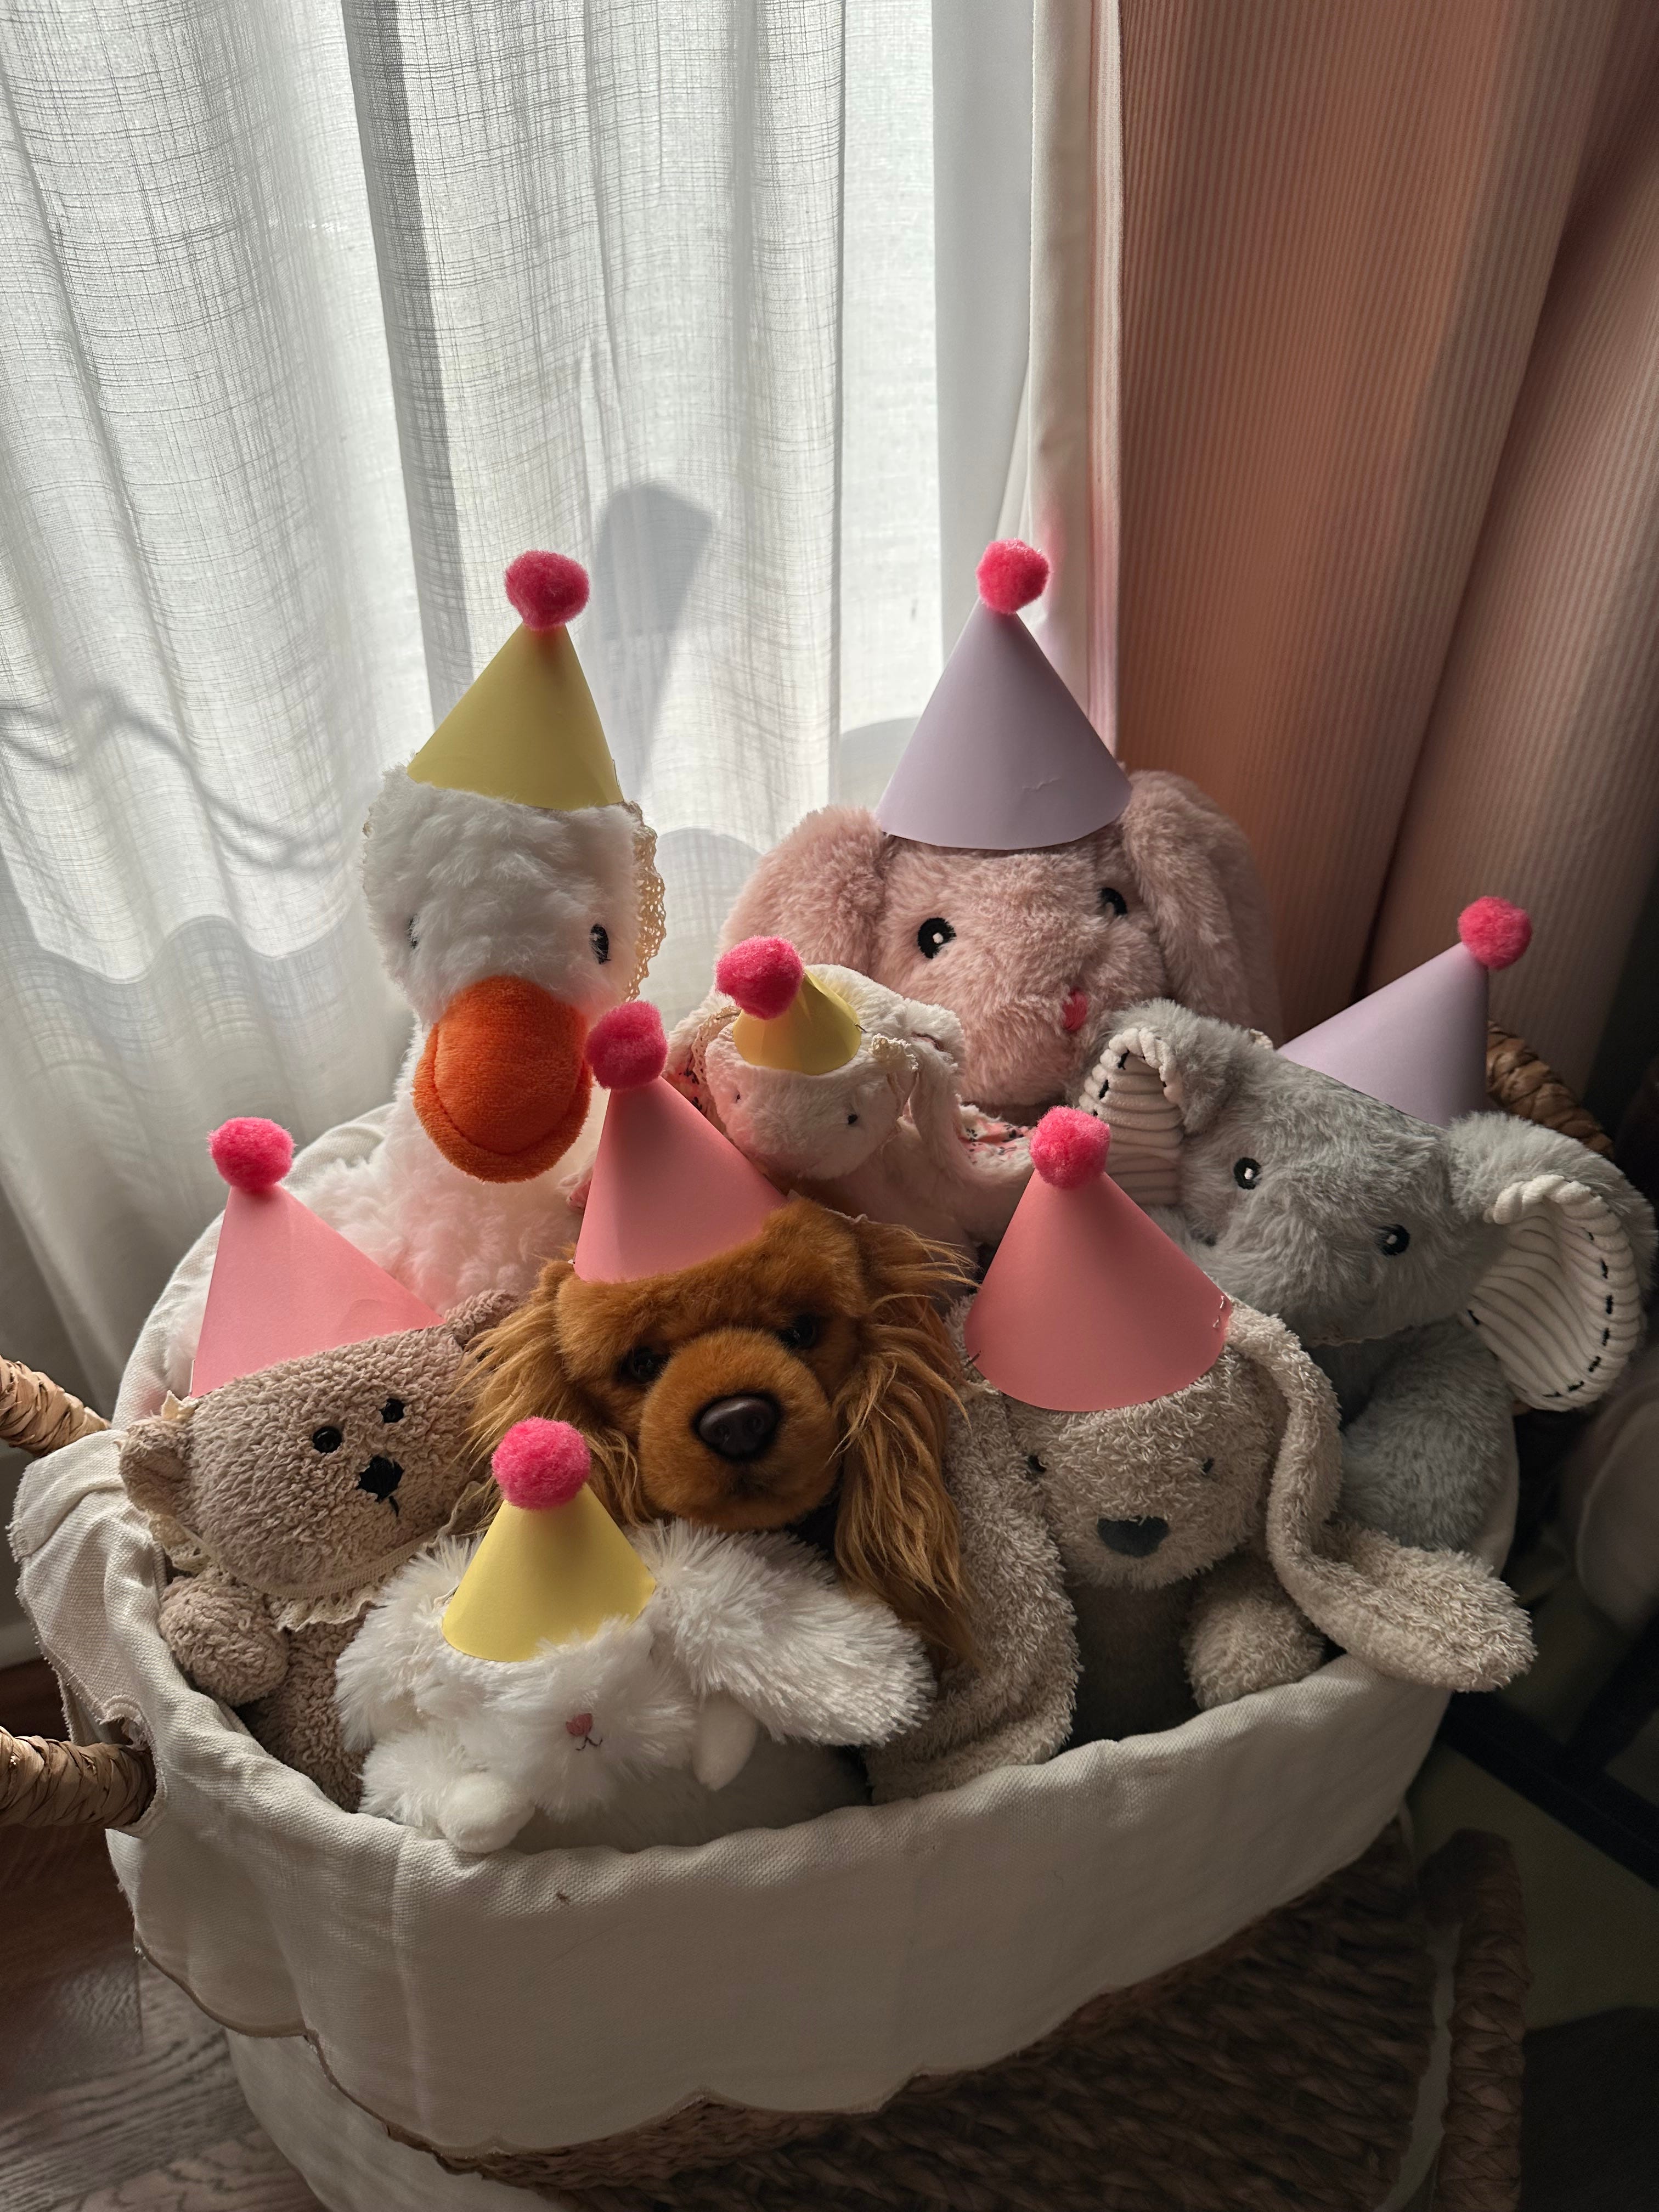
Party hats for her stuffies
I really was scrappy with this one…up close, they look honestly terrible, but they were precious and sweet and easy still!
Need:
- Three or four colors of construction paper
- Scissors
- Pompoms
- Fabric glue
- Some kind of ribbon (best with elastic)
- Stapler
I chose pink, purple, and yellow cardstock with pink pompoms and lace ribbon to make my party hats. I laid out all her little animals on the library floor and cut half circles according to their head size. I pulled the edges together to form a cone and then stapled. Now, this was especially harder for the smaller animals, as my stapler doesn’t staple flat, but for the regular sized cones, it worked perfect! Then I cut a piece of lace ribbon and stapled those to the inside of the cone in order to make the chin strap. A dab of fabric glue on the pompom, and they were dry by morning!
Kit’s party hat garland
Need:
- Twelve pictures of their face, one from every month! (I did mine in black and white.)
- Three patterns of construction paper
- Pompoms
- Double sided tape
- Scissors and hole punch
- Twine
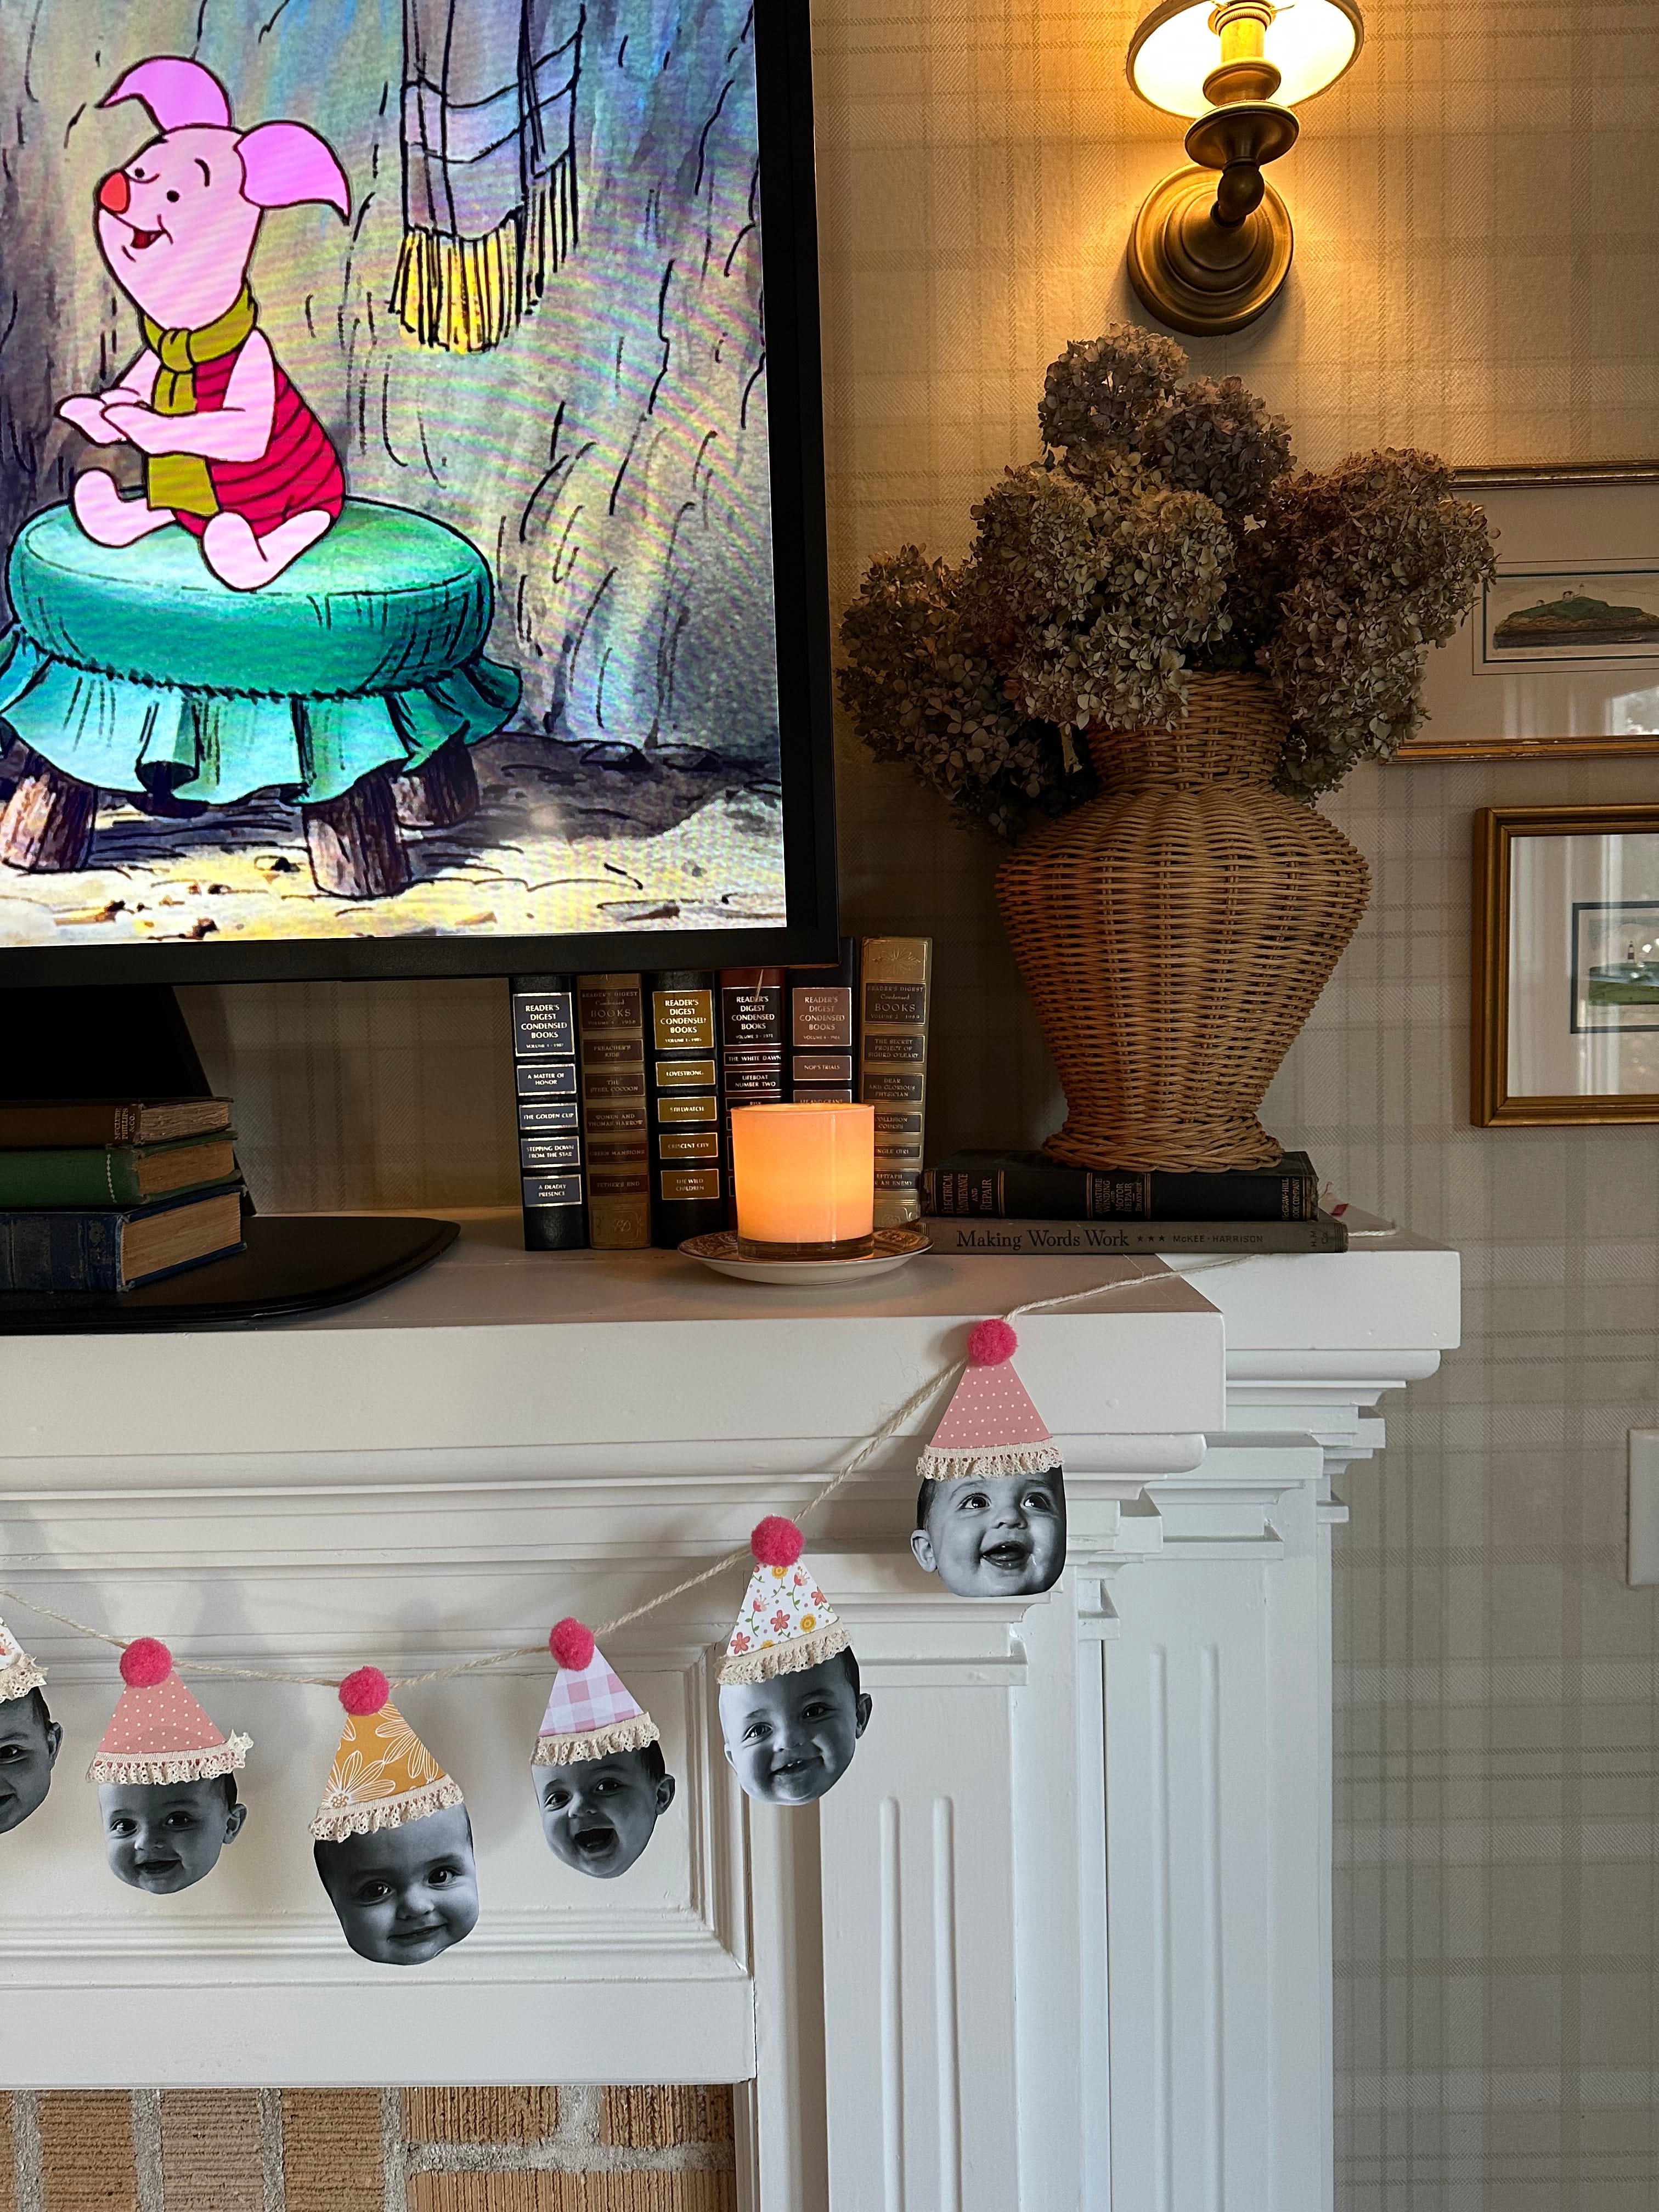
When you print your pictures, make sure to crop them so their sweet faces are all the same size. Then cut them out and lay them in order. I cut small triangles out of my chosen construction paper and used double sided tape to secure to the baby faces. After hole punching the very tip of the hats, I strung them onto the twine and hung on our library mantle. Now, they didn’t hang straight, of course, but sideways. So I used a tiny piece of double sided tape on the pompoms to essentially tape the faces the way I wanted them to face (taping to the twine)!
Menu
Chicken Salad Croissants
My mother-in-law made chicken salad for us this summer, and I got her recipe and haven’t stopped making it since. I’ve changed things here and there, either from forgetting an ingredient at the store or just trial and error, and I’ve settled on the easiest, easiest recipe that I don’t even have written down anywhere except in my mind.
Ingredients:
- One rotisserie chicken, shredded (I only use the breasts)
- About a half cup of slivered almonds
- Two stems celery, finely diced
- About two large spoonfuls Duke’s mayonnaise
- Tablespoon Cavender’s seasoning
- Dash dried parsley
- Juice of one lemon
1. Roast almonds in a pie dish at 350 until golden brown.
2. Chop shredded rotisserie and add to a medium size bowl. Add chopped celery, mayo, seasoning, and lemon juice. Mix.
3. Add almonds once slightly cooled.
I made this recipe three times over for the party, serving on croissants I got from the grocery bakery!
Cucumber sandwiches
I had never made these, but I really wanted to use a butterfly cookie cutter for the sandwiches, so cucumber sandwiches it was! I used Sola oat bread, cut with a $3 butterfly cutter from Amazon, then spread regular Philadelphia cream cheese on one piece, added slivers of cucumber (cut with a veggie peeler), and that was it. There was no culinary expertise to this party, I promise!
Strawberries and donut holes
Lemonade and sweet tea in pretty pitchers
My mom’s chocolate birthday cake / A secret family recipe…so sorry.


Birthday gift ideas
Swing set! Price and I have known for months this was what we wanted to get her. We found a simple wooden one from Lowe’s, and Price built it after Kit went to bed one night. It is the perfect size, and looks so sweet with potted flowers at the base. We ordered a Swurfer swing attachment to start – a baby seat that almost looks like an egg, holding her so comfortably. She loves it!
Kitchen tower…this was my mother-in-law’s idea, and I am so happy she had it! Kit is so near to wanting to be at the counter with me, often wanting me to hold her while I make her breakfast. We got the sage green, and it is beautiful.
Radio Flyer wagon, the most nostalgic one of all. I had thought of this idea for my parents, and come to find out, my mom had already decided on it! My brother and I grew up with a red plastic Radio Flyer, the ones with the little door and no seatbelts, where you felt every little bump in the road. I couldn’t believe how fancy these things were nowadays…I sent my mom a link to a canvas version, with a push and pull option and a removable roof. We tried it for the first time this morning, and I can’t tell who loves it more…Kit or Annie.
Birthday cake plate! Such a beautiful keepsake.
Retrospec baby bike! This gift stole the show…a little tricycle almost, meant specifically for one year olds. Kit is slowly learning how to make the bike move without us pushing her, but regardless, she is loving climbing on and off and using the front handlebars as a walker.
After Kit’s party thoughts…
I’ve spent this last week finishing up the first year portion of her baby book, a sadness I never anticipated, given the book doesn’t ask for any updates again until she turns two. How do I go from noting every sweet thing from every month of her life, to just…not? I took down her paper garlands and stored them in hole-punched Ziploc bags, clipped into her book for safekeeping. I imagine I’ll display them somehow every year, or just start all over and do birthday crafts every March. I feel this excessive sentimentalism is a plague I cannot escape, one I wish I didn’t have, allowing me to feel time passing purely as a gift, and not a sadness. But I know these feelings are really not a plague, but evidence of the Lord, evidence of His goodness, that He has given me people and moments and miracles to cherish so deeply, I ache for the memory of each day I’ve lived. So really, thank you, Lord. For my daughter and her birthday party. For motherhood and time.
//
Shop all my supplies here.
So lovely 🤍 after my daughter turned one last year and the baby book required no updates until 2 (to my dismay haha) I started a scrapbook for her! It’s been a happy way to enjoy our memories as they happen, and a way for me to sit with the passing of time. There is really nothing like watching a baby grow! ✨